Facing trouble removing the Presta valve core? Don’t know how to do it properly? We’ve come up with a simple technique to get rid of it as it’s a less-discussed problem.
How to Spot a Removable Presta Valve?
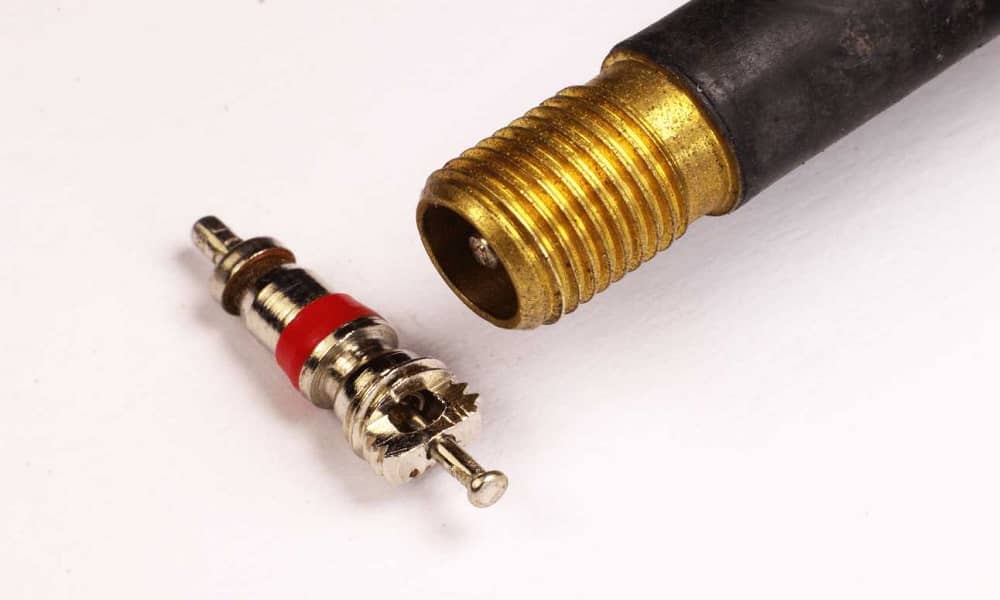
The lock ring is attached to a broad threaded portion on a Presta valve. The cap screws onto a narrower section with the valve lock nut above it. It’s removable if the narrow component has two flat sides that can be reached with a tool.
To Remove the Presta Valve Core, Perform These Steps:
|Step 1| Begin with a relevant tool
The first step in removing a Presta valve core is to obtain a tool that will allow you to begin the operation quickly. The Presta valve core is a small element inside the bike’s value core that helps pump up or air out the bike tire more quickly and securely. You can use the Presta core remover tool that came with your bike to remove it. However, if you lose it or your bike does not come with a removal tool, you will need to purchase one from the store. Furthermore, an appropriate instrument can be used to perform the Presta core removal process. To remove the Presta core, for example, you can use a chain tool. However, many people find it difficult to use when removing the Presta core from a bike tire. You’ll need to go to your local store and acquire some pliers and a tiny park tool to get the job done quickly. Make sure you have a nice park tool and pliers that fit the Presta core on your bike. Proceed if you have finished purchasing a tool for the next step.
|Step 2| Deflate your bike tire
After you’ve purchased a proper tool for removing your Presta valve core, you’ll need to air out your bike tire. For a secure approach, several experts recommended removing the Presta valve core after inflating out the bike tire. To easily open the valve when deflating your bike tire, simply rotate the valve core small part in the opposite clockwise or left direction. Then, to air out the bike tire, simply press down on the top area of the valve core. Even though this step appears to be quite straightforward, you should proceed with caution and care. After that, place your thumb in the valve core’s tip and press down for a few seconds to confirm it is airing out. You should keep doing this until you observe the bike tire is fully inflated or deflated. Make sure you’re not applying too much pressure at this stage. If you force the valve down any further, you risk damaging the Presta valve core. When completely airing out the bike tire, make sure to close the valve core tip. To lock the tip, just twist the valve core clockwise or rightward and tighten it using pliers. Proceed to the next step as soon as you notice your bike tire has deflated.
|Step 3| Unlock the lock nut
Once the bike tire has been deflated, you may begin the process of removing the Presta valve core. To do so, remove the lock nut from beneath the valve core. It is genuinely visible, and some valve cores do not include it. So, if you don’t notice a circular lock nut on the outside of your entire valve core, move on to the next step. However, if you have a valve core with a spherical lock nut, you should remove it. Simply twist it until the spherical lock nut appears in your hand to remove it. To unlock it, don’t use any pliers or other tools. It’ll be easy to do the task if you just use your hands.
|Step 4| Attach the tool to the valve core of your bike
Then you’ll need to insert your park tool into the bike’s valve core. Before using the tool, make sure it has a large and small portion that can easily fit into the valve core. To attach it, you must first arrange the bike tire in a straight posture so that the valve core can be attached. Then, with your right hand, insert the valve into the valve core with your left hand. After that, go on to the next stage as quickly as possible.
|Step 5| Twist the entire valve core
Gently twist the entire valve core now. Twist the core quicker till the Presta valve comes out in your hand once more.
Conclusion
That’s all we have to say regarding the process of elimination. If you don’t want to get trapped while riding, you’ll need to know the proper way and instructions for removing the Presta valve core. It’s something we don’t pay much attention to, but when disaster strikes, we’ll be sorry we didn’t pay more attention. So, set aside some time for this and, if feasible, practice.
Tips
A Schrader pump should not be used on a Presta valve. If you press the pump pin onto the valve pin, you risk destroying it. The Presta pump head opening is smaller and has an empty center. There are pumps with two independent heads or interchangeable heads.
FAQs
Q: How does having a removable valve core benefit me?
A: The valve may be serviced thanks to a replaceable valve core. If the valve fails, just replace the core and continue to use the tire.
Q: Can I use a low-cost generic valve core in my tubeless system?
A: Yes. To go tubeless, you don’t need a complex valve core.
Q: How important is the size of a Presta valve?
A: The diameter of most Presta valves is the same. The length, however, may vary depending on the wheel on which they’re mounted.
Q: Should a Presta valve core be tight?
A: There is no such thing as “valve torque.” Simply tighten the valve core until it is secure.
Q: Why does the core of my Presta valve keep coming out?
A: If the valve core is coming out, the threading is probably worn out or the valve isn’t tight enough.